For this Tutorial I shall be using Photoshop CS5, but I think GIMP may also suffice...
1) Find a suitable background.
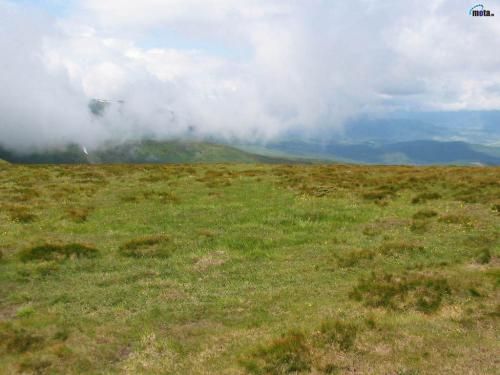
For this Tutorial I shall be using this Image:
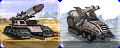
2) Next make a voxel with all the parts of your unit in it. In my case a turret and the chassis. Go to the Display 3D Window and change the House Color to the side of your choice. (More often than not you may opt to instead recolor these to the same hue of your unit itself.)
3) After you've done these two it's time to start work on the actual cameo. Start cropping & resizing your background to exactly 60x48. This is the standard Cameo Size.

4) Now remember that screenshot of the Voxel. This time remove everything else that you do not need and copy that over to the 60x48 image. Resize to the appropriate size of your choice.
From here I usually make 3 copies of the Unit. Layered from Top to Bottom:
Resized with Gaussian Blur (25% opacity)
Resized with Blur Effect (50% opacity)
Resized with Sharpen Effect
Resized
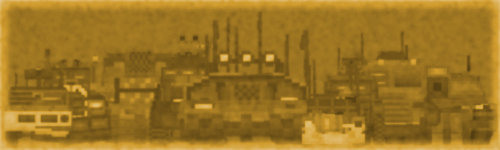
You should now end up with something like this:

5) Next add a shadow layer, The Shadow Layer is a jet black color with opacity set to 50-65% usually.
Also I've opted to touch up the background by namely adding a sunlight from the top left corner for the shadow to seem more believable.
It should now look something close to this:

6) Next step is to apply the same glass effect as per Red Alert 2 Style. I've made my own version of it with the Transparency set up already so you just need to copy this over as the top-most layer for now. (Original Glass Effect is somewhere here in PPM)

All that's left now is to add in the Text and the Text Bar. Download the Template somewhere in PPM (Again...Sorry I can't remember
The Chevron is 2 pixels off from the top and top-left.
Here we have the pre-final version:

All that's left now is to export this into SHP Builder.
And here it is as exported using the RA2 Cameo Palette... with some touch-ups of course.

As SHP Builder isn't always that great, results may vary greatly from what you want and as always this is a trial-and-error thing so don't get disappointed too much.... With Ares you may opt to use PCX instead which allows you to keep the details of the original image.
Hope this helps.